Just typing in the words ‘ yoga sequence ‘ on You tube will give you about 131.000 hits. Then there’s yoga sequences for beginners, for weight loss, for abs, for core, for sleep, for hips, etc. And still, many participants from our yoga holidays and also my students in Antwerp often ask me for a ‘nice yoga sequence’ to do at home.
I usually send a personalized sequence of yoga poses, based on what I saw in the classes. Some people need more flexibility in the hips, others have lower back problems and then we have the tight hamstrings and frozen shoulders as the most common areas for improvement.
Here below are some ideas for a nice yoga sequence. Of course, you can be very creative and adjust but the creativity might just be the thing that is lacking when you’re just starting with yoga.
So here it is, a sequence to do at home, which will keep you busy for about 30 minutes.
Centering
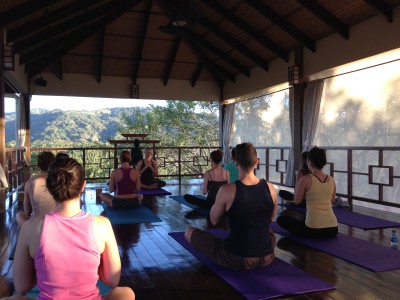
Centering in Ahki, Costa Rica, not too difficult..
First of all, take a moment to ground yourself. Sit up with your back as straight as possible.
Set your timer for 5 minutes and simply start to consciously breathe. You count an inhalation and an exhalation as 1. The next inhalation and exhalation is 2, and so on.
The idea is to slow your breathing down, and have the inhalation and exhalation last equally long.
Most people, when starting with this exercise end up, after 5 minutes, somewhere between 30 and 50, but you can slow it down towards 10-15 breaths.
Practice makes perfect but luckily all is good in yoga 😉
In one of my previous blogs, 4 yoga poses to ease headaches, I mention another breathing technique.
Warm up
Shoulder lifts
Many people hold tension in their necks and shoulders, leading to stiffness, bad posture, and tension headaches. This exercise will ease tension on your shoulders. Do this exercise slowly and keep your spine straight and your neck relaxed.
Raise your right shoulder, then drop it down.
Raise your left shoulder, then drop it down.
Raise both shoulders at once, then drop them down again.
Sun salutations
The best way to warm up your body !
Just doing three rounds of Surya Namaskar will tackle all your vital muscles and organs, therefore it’s a perfect workout on itself.
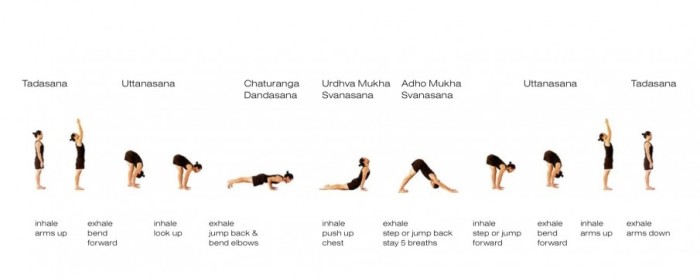
Surya namaskar, the perfect warm up!
Cat cow
The cat pose teaches you to initiate movement from your center and to coordinate your movement and breath. Anyone with a lower back problem, should definitely do this as often as possible.
Be gentle with your neck on the in breath, there’s no need to stretch it all the way up.
Start on your hands and knees. Position your hands directly beneath your shoulders and your knees directly beneath the hips. Have your fingers fully spread. Make your back horizontal and flat. Gaze at the floor. This is your “neutral” positioning. When your pelvis is in neutral, your spine will be at full extension, with both the front and back sides equally long.
As you wait for the inner cue, do not sag into your shoulders. Instead, create a line of energy through each arm by pressing downward into your hands and lifting upward out of your shoulders. when breathing in.
As you exhale, turn your hips into cat tilt. Do this by gently pulling the abdominal muscles backward toward the spine, tucking the tailbone down and under, and gently contracting the buttocks. Press firmly downward with your hands in order to stay lifted out of the shoulders, and press the middle of your back toward the ceiling, rounding your spine upward. Curl your head inward. Gaze at the floor between your knees.
Downward facing dog for 10 breaths.
Child pose for 10 breaths .
Spicing it up
If you want to add some spice into the yoga sequence, and feel your abs…, you could do some rounds of ‘downward facing dog – knee to nose – plank’.
Dolphin pushups are ideal for stamina, lower back strengthening and even work meditatively 😉
Breathing in upwards, breathing out in dolphin plank. 5-10 is a nice start.
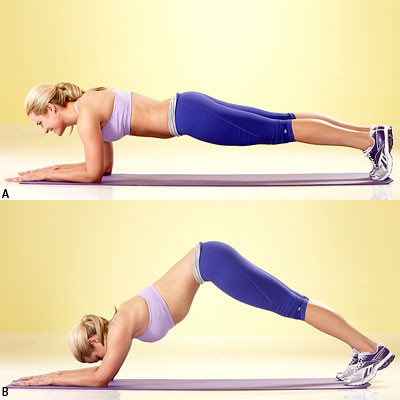
Yoga with your shoes on? Nope, this picture is just to show you what I mean with Dolphin pushups.
Standing postures
You can add some lunges, and a warrior 2 for strenghtening the legs.
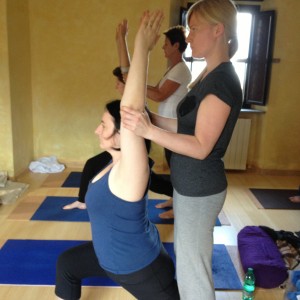
Assisted lunge in Italy
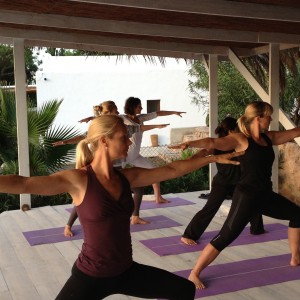
Warrior 2 in Ibiza
Seated postures
Gentle seated twists are the best way to start slowing down your practice and coming back down again.
Final poses
Any form of spinal twists will do, whatever pose feels best to you.
Releasing the back, releasing any tension that you might still feel. Stay at least 5 to 10 breaths on each side.
And then, ahhhh, a well deserved 5 minute savasana or corpse pose!
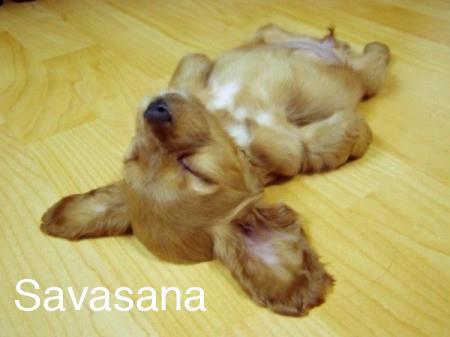
Just found this picture on the net, so cute!!!
You may be tempted to skip out early but it’s better not to as you can think of it as a little power nap and personally, I see it as one of the most important parts of a yoga practice.
These final, still moments will not only allow you to let go of any tension you worked out during practice but it allows the body a chance to regroup and reset itself. After a balanced yoga sequence, the entire body will have been stretched, contracted, twisted and inverted. This means that even the deepest muscles will have the opportunity to let go and shed their regular habits, if only for a few minutes.
Enjoy your practice, and please feel free to provide feedback!
Namaste,
Rachel




Leave a comment